CintaNotes is a simple application for taking quick notes, which makes it easy to collect, find and store information. This guide will teach you the basics of working with the program.
Collecting notes
CintaNotes makes it easy to collect and keep track of any important data that you find both on- and offline.
Clipping text
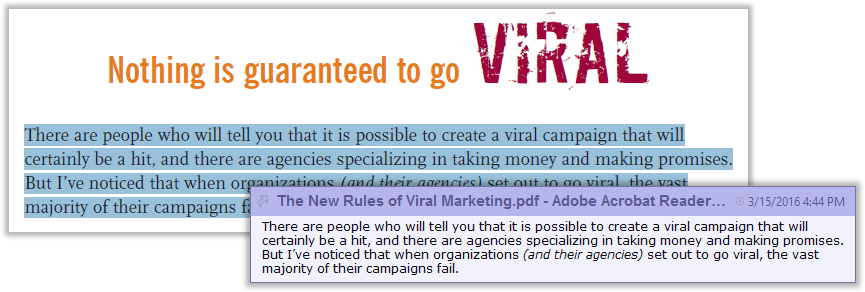
CintaNotes can save quotes from any application that works with the system clipboard. For example, to save a quote from an e-book, simply select the text and press Ctrl+F12. CintaNotes will automatically create a new note with this text.
Taking notes manually
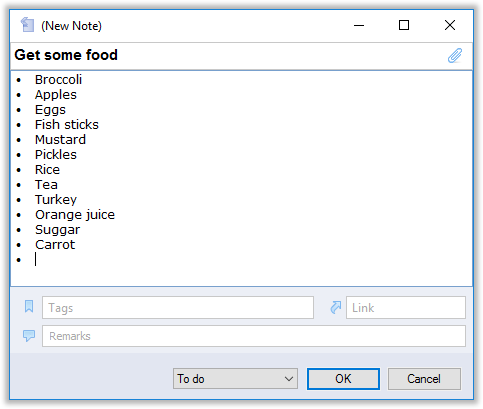
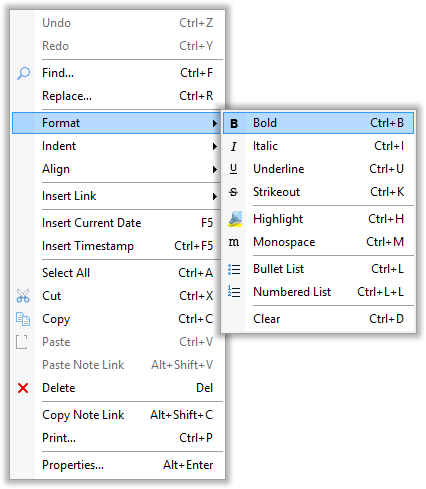
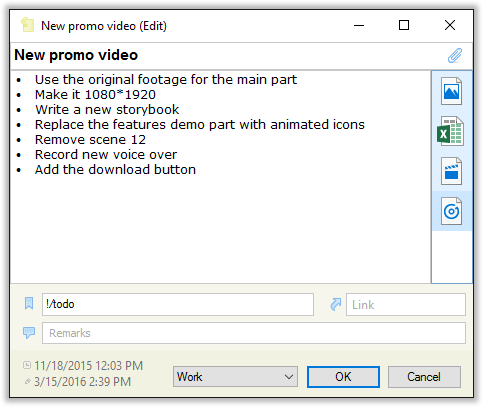
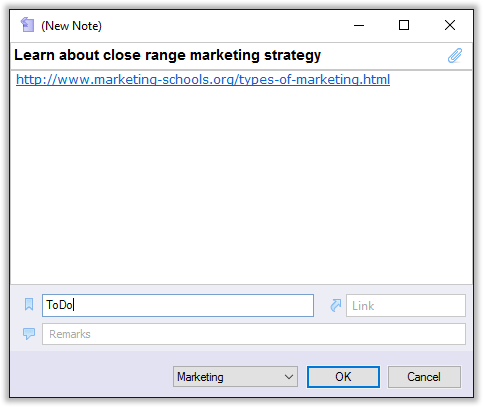
Sometimes you need to simply write down your thoughts and ideas: for example, make a shopping list. To do this, hit the Insert button in the main CintaNotes window. The program will display the note editor where you can enter the note’s title and text. Here you can also format your text with the basic formatting tools. For this you need to right click on any selected text and choose a formatting command from the “Format” context menu.
Pasting notes from the clipboard
You can also create notes by pasting text from the clipboard into the main CintaNotes window (Ctrl+V).

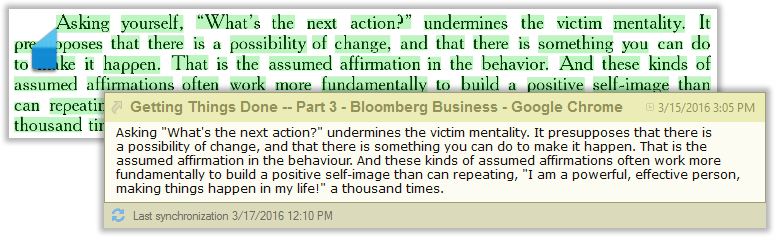
However, using the clipping hot key is preferable, because in this case CintaNotes also captures the link to the note’s source. For example, if you clip a note from a web page, the Link field will receive the URL of this page.

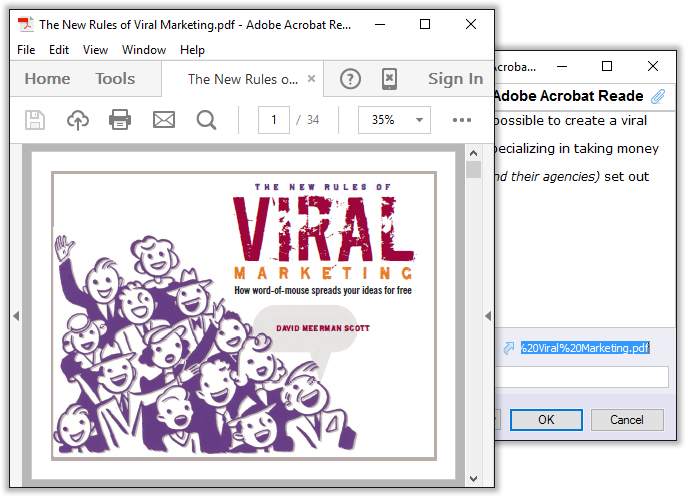
The note’s link can also lead to a file on your computer.
Editing and formatting notes
Existing notes can be edited at any time. Simply double-click on any note and the same not editor window will pop up.
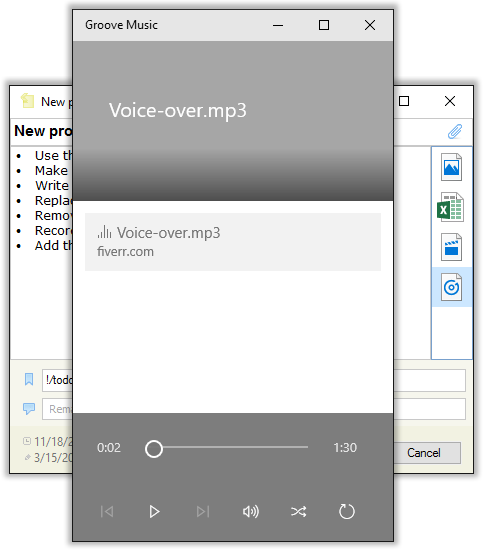
Attaching files to notes
You can attach documents, e-books, audios, videos and other files to your notes. Just open any note, click on the paperclip button at the top right corner of the editor, and select the files to be attached.
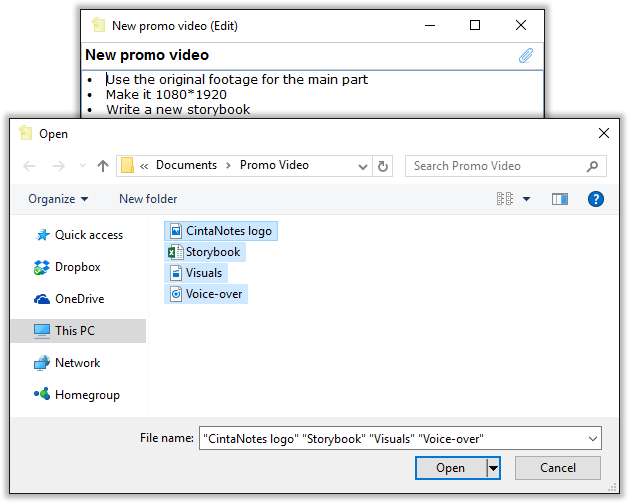
After clicking Open, the files will be copied into the notebook and will appear in the attachments panel (note that the notebook physically contains the attached files, and the original files are no longer needed for working with the attachments).
You can access them at any time by opening the note and double-clicking on any file.
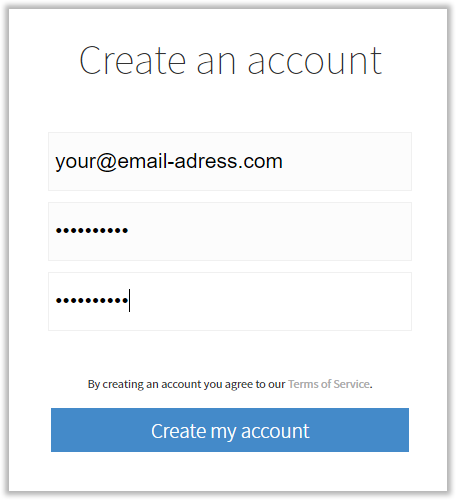
Taking notes on mobile devices
To view and edit notes on your mobile devices, you need to sync them with Simplenote. Simplenote is a free cloud service for sharing and synchronizing notes. First, go to simplenote.com to create your Simplenote account.
Then open the Synchronization window and log into your Simplenote account.
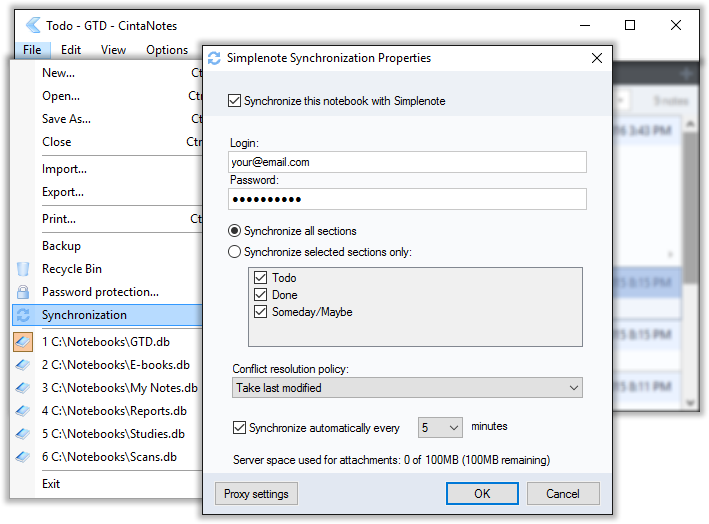
After this, your notes will be synced.
![]()
Now install and run the Simplenote app on your mobile device and connect it with your account (links to apps for each mobile platform can be found also on the Simplenote website). Each time you create a note with Simplenote on your mobile device, it will automatically be synchronized with the notes on your PC. This way, the notes you take on your phone or tablet PC will be instantly available on your PC.
Using Simplenote, you can access your notes from the web and on platforms other than Windows, such as Mac, iOS, Android and Kindle. However, since Simplenote doesn’t support file attachments, CintaNotes uses own server for syncing attached files (up to 100 Mb per user). They are encrypted with your Simplenote password, this means that no one except you will be able to decrypt them.
Finding notes
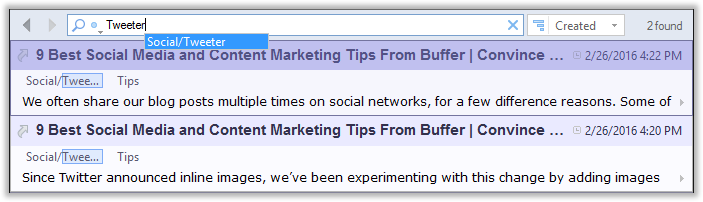
CintaNotes makes it really easy to find your notes. Just switch to the program’s main window and start typing anything related to your note. CintaNotes updates the notes list as you type.
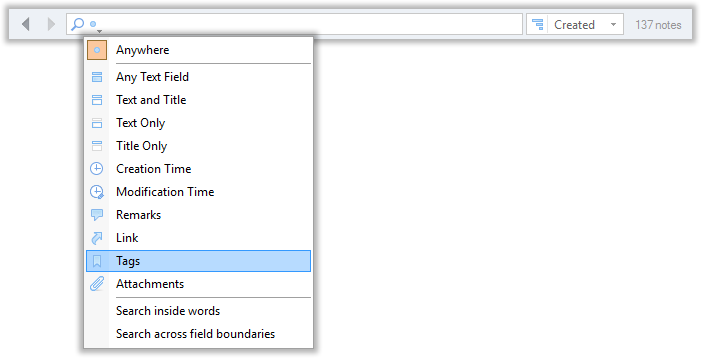
Sometimes you want CintaNotes to focus on specific fields of your notes when you search. Click on the magnifying glass icon to choose from a list of available fields.
Organizing notes
CintaNotes not only helps with collecting data, but also has a wide range of tools for organizing it. This allows you to have the most important data a mere mouse click away.
Notebooks
CintaNotes stores notes in notebook files. Having multiple notebooks can help you classify your notes by topics.
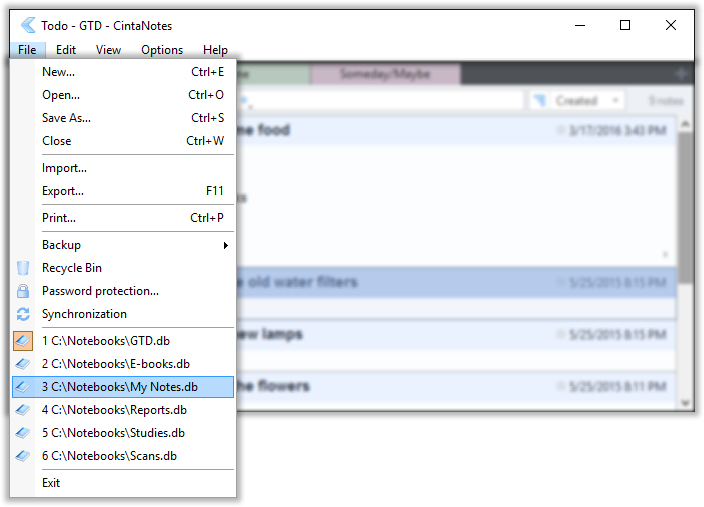
To create a new notebook, go to the File menu and select the New command.

This is also where you can open existing notebooks with the Open command.

Sections
You can further improve organization of your notes by using sections. Sections are represented as tabs at the top of the main window, and help you keep notes on different topics apart from each other within one notebook.
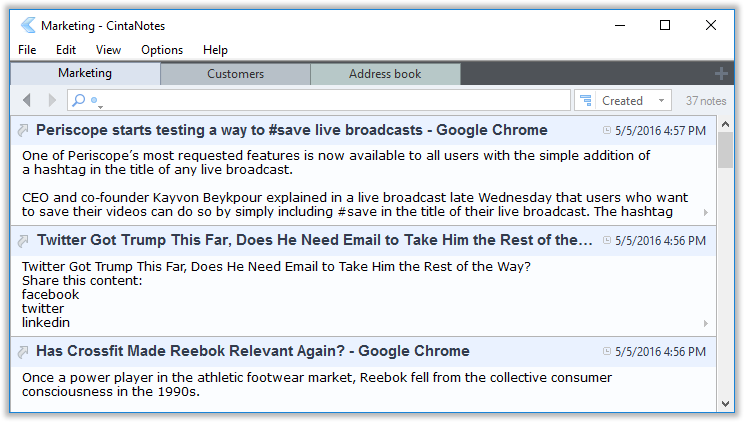
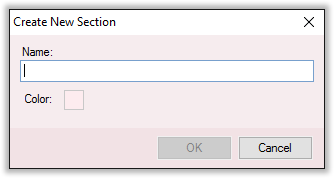
To add a new section, simply click on the plus icon on the right.
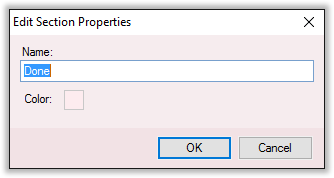
You can rename any section by right-clicking on it, selecting Properties, and specifying a new name.
Tags
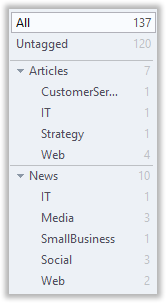
If you want to add even more levels to the classification of your notes, you can use tags. Tags are keywords used to describe and group your notes. They help you quickly find any piece of information you save, even in a long list. The main difference of tags from sections is that a note can belong to only one section, but have many tags.
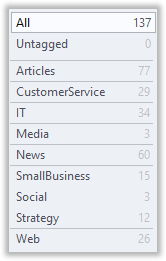
For example, to create a to-do list from actionable notes, you can simply add a “to-do” tag to them. You can add tags by writing them in the Tags field in the editor. To bulk tag several notes at once, select them in the notes list and press F4.
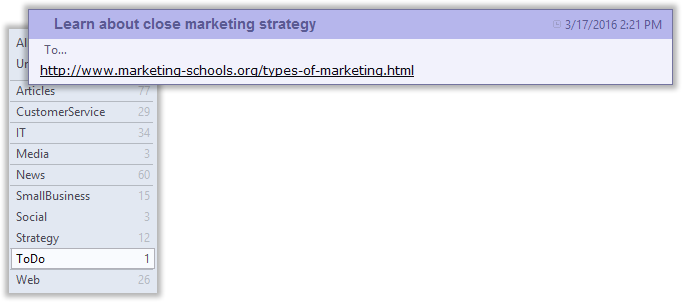
The newly added tag immediately appears in the Tag Sidebar. Clicking on it will display only notes that have this tag.
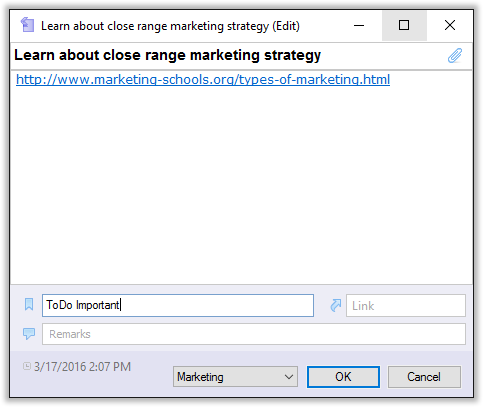
Adding several tags to one note is also supported: if you separate tags with spaces, CintaNotes will recognize them as different tags.
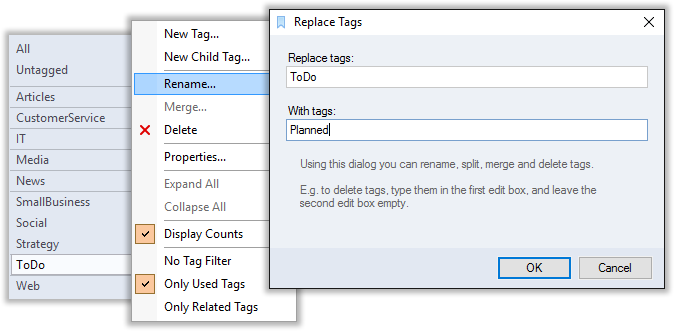
You can rename any tag by right-clicking on it in the Tag sidebar and choosing the Rename command from the context menu.
Hierarchical tags
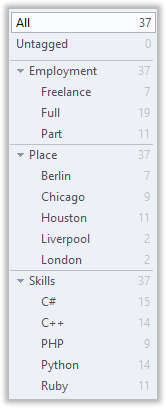
One advantage of CintaNotes is that it can organize tags into a tree-like structure. In this structure, tags are bounded by parent/child relationships, where child tags are at the bottom of the hierarchy. Using hierarchical tags, you can add even more levels to your classification.
Here is an example of using hierarchical tags for creating a database with software developer vacancies.
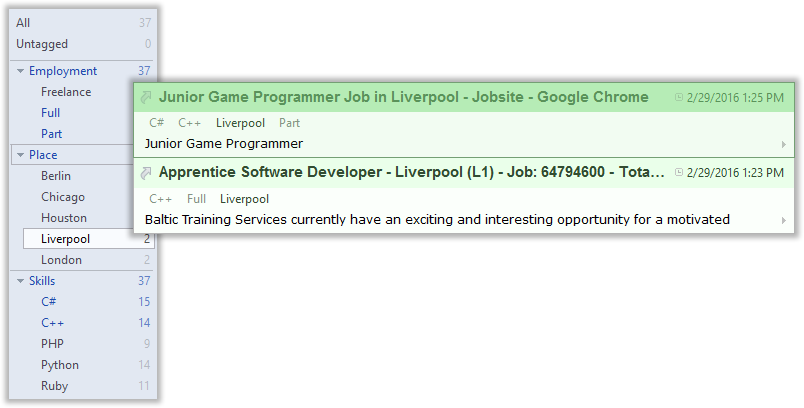
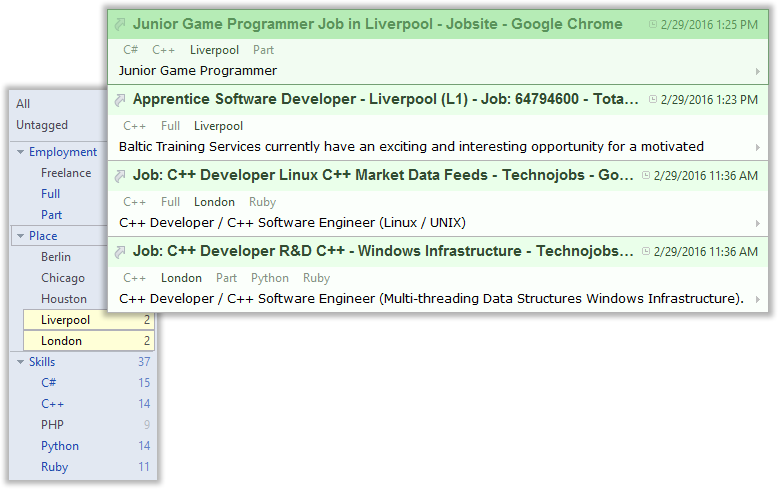
Now with just one click you can view all Liverpool vacancies.
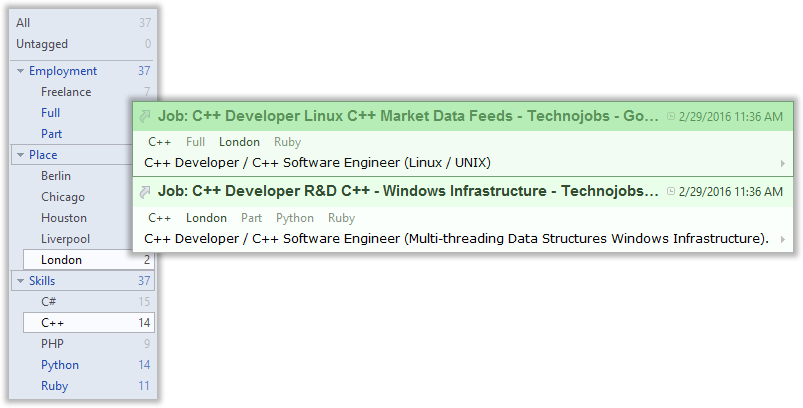
You can also display all vacancies from London and Liverpool. For this, simply select London and then click on Liverpool while holding the Shift key. This will create a tag union to display any one of the selected tags.
Ctrl+Click, on the other hand, creates tag intersection with all of the selected tags. This means that only notes having all selected tags will be displayed. For example, if you need to see all C++ vacancies in London, click on London, and then, while holding Ctrl, click on C++.
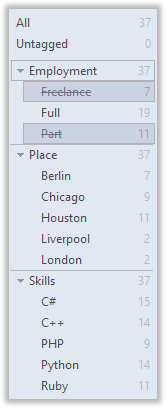
Using Alt+Click you can exclude certian tags from view.
Securing notes
Privacy and security are what makes CintaNotes special compared to many other similar applications. CintaNotes allows you to always stay in control of who can access your notes.
No forcing into the cloud
CintaNotes doesn’t require that you use any cloud drives to store notes. It’s not required to register online. Instead, your notes can reside only on your device, and you can work with them regardless of your Internet connection.
It’s not even necessary to install CintaNotes! Simply download the portable version, and you’re ready to run it directly from your flash drive.
Protecting notebooks with passwords
To keep your notes private, you can protect your notebook with a password. Tick the box right next to this option in the Password Protection menu, and enter your password. From now on, each time you try to access your notes, CintaNotes will ask you to enter your password first. CintaNotes will encrypt the whole notebook file, and without the correct password the attacker won’t be able to read your notes even having physical access to your PC.
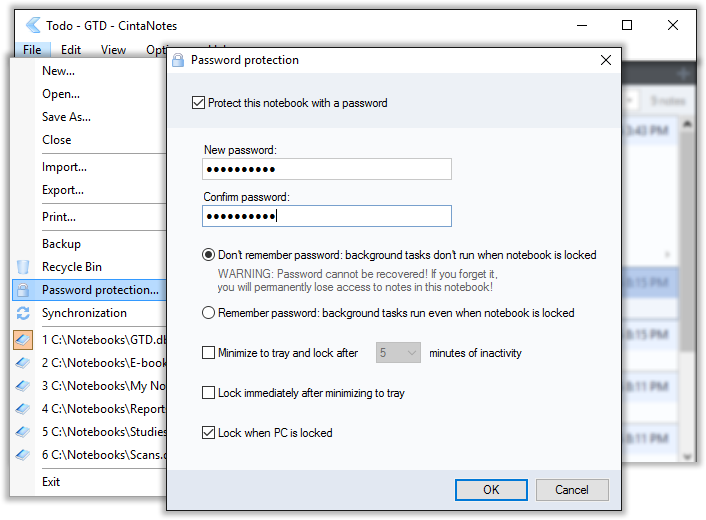
In this menu you can change or remove your password. Also you can specify how CintaNotes should handle entered password: forget as soon as possible, or store encrypted for convenience. Forgetting password is safer, because the password will be in transient memory and for as little time as possible. However, this also means that background processes – such as cloud syncing – will stop when the notebook is locked. Remembering your password, on the other hand, will allow background processes to run, but will store the encrypted password on your computer, which makes it a bit more vulnerable (but still very strong).
Notebook backup
CintaNotes understands that there’s nothing more valuable than user data. To minimize risk of any data loss, it automatically creates backup copies of your notebooks.
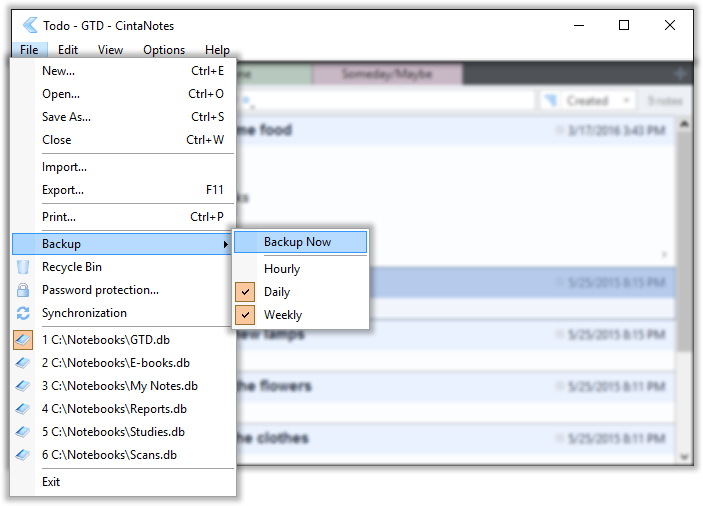
By default, CintaNotes creates daily and weekly backup copies. Normally, this is enough for working safely, however, you can set CintaNotes to create a backup copy every hour.
In case of emergency, you can also create a manual backup with the “Backup Now” command.