About sections
Any CintaNotes notebook consists of one or more sections. Sections represent a disjointed set of notes—that is, notes which you’d like to keep separate, but still in the same notebook.
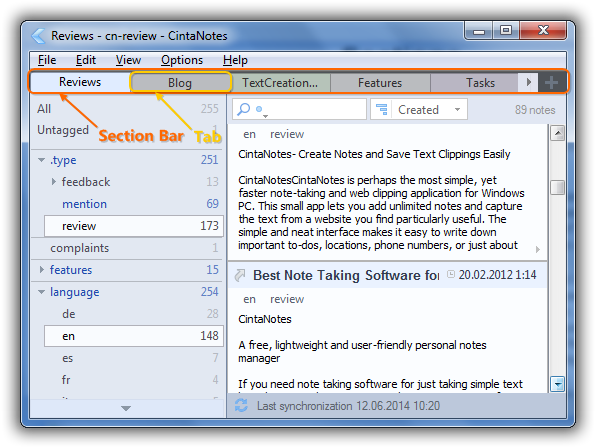
Sections in a notebook are represented as tabs on the Section Bar, which is located near the top of the primary CintaNotes window, right below the main menu. When CintaNotes creates a new notebook, it also creates a section called “Main”. Right-clicking on a tab in the Section bar brings up a context menu which contains all section-related commands.
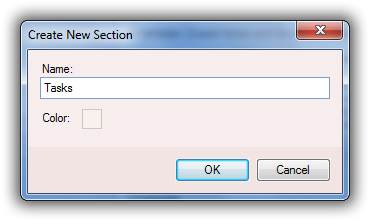
The Create New Section command adds a new section to the notebook. In the dialog box that comes up, you need to specify the name of the new section. Each new section is assigned a random color; you can change the section’s color by clicking on the little colored box beside the “Color” field in the “Create Section” dialog window.
Please note that the final tab color can differ from what you’ve picked: to ensure comfortable brightness and contrast levels, only the hue of the selected color is used.
To rename a section, or to change its properties, use the Properties command in the section tab’s context menu.
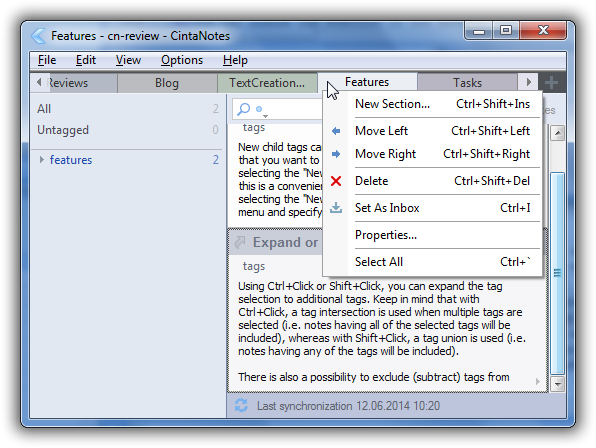
Deleting a section is possible through the Delete command of the same menu, or via pressing Ctrl+Shift+Del. Be aware that all notes the section contains will be deleted and unrecoverable! If you want to delete the section but keep the notes, you should first move the notes to another section via selecting them and executing the Edit/Move/To Section command (Shift+F6).
You can change the position of the section tabs with the Move Left (Ctrl+Shift+Alt+Left Arrow) and Move Right (Ctrl+Shift+Alt+Right Arrow) commands.
Using sections
Sections should be used for unrelated sets of data when you want to create a distinct separation. Here are a few examples of correct section usage:
- Separating private notes from notes related to work;
- Keeping notes about different work projects distinct from each other;
- Creating a temporary “place of chaos” for collecting information on a specific topic, which you
don’t want to mix with your notes and intend to process later; - Variations of the above.
In other cases it would probably be better to use tags.
Section view state
In CintaNotes, each section maintains its own view state, which includes note sorting order and tag selection. (Note that search parameters are not considered part of a section’s view state and are shared between sections.) When you switch between sections, the view state parameters are saved and restored on the fly. This enables you to define the most convenient sorting order for each section, or create a predefined tag selection which will be activated each time you switch to that section.
Selecting multiple sections
What do you do if you want to find something, but you don’t remember which section it was in? What if you need to temporarily combine notes from two sections?
CintaNotes solves these problems via supporting multiple section selection. You can Ctrl+Click on a tab, and this tab will be added to the current selection instead of replacing it. Notes from this tab will be added to the notes list.
What is necessary to remember here is that the first section that was selected is the “main” section that defines the view state (the sorting order and search parameters).
The Ctrl+Shift+Space shortcut, or the “Select All” command in the section’s context menu, allows you to quickly select all sections. This can be useful when you don’t exactly remember the needed section and want to search your whole notebook, for example.
The Inbox section
An important question is the following: which section do notes created with system-wide hotkeys, such as the clipping hotkey, or new note hotkey, go to?
By default, such notes go to the currently active section. If multiple sections are active, then they go to the section which was selected first (the “host” section).
However, this requires you to always remember which section is currently active, even when CintaNotes may have been minimized to the tray hours ago — sometimes this may be less than ideal. It may be more convenient to have a designated “inbox” section to accommodate such notes. And in CintaNotes you can do just that: mark one of the sections as an Inbox section.
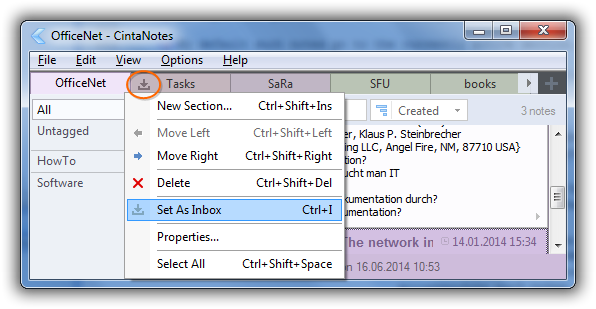
A section can be marked as Inbox with the “Set as Inbox” context menu command, or simply via middle-clicking on the section’s tab. Also the active section can be set as Inbox by pressing Ctrl+I. The Inbox section tab has a special icon.
When there exists a section marked as Inbox, new notes created from the system-wide hotkeys go to the Inbox section even when it is not active.
Please observe that this applies only to notes created with system-wide hotkeys! The rules are different for notes created via the Edit/New command (or via pressing the Ins or Ctrl+N key in the main window). In this case, CintaNotes assumes that since you’re currently looking at the notes list and working with a specific section, you’d also want new notes to be created in the currently active section, regardless of which section is marked as the Inbox (if any).
(For the sake of completeness, there is one case when the Inbox status is used outside of the system-wide context: if multiple sections are active, and the Inbox section is among them, the notes will go to the Inbox section and not to the “host” section.)
Sections and Tags
Tags are global and shared between all sections. So don’t be surprised if you see a lot of tags with a use count of zero when you create a new section.
There’s an easy way to reduce the clutter here. By activating the “Used Only” tag filter mode in the Tag Sidebar’s context menu you’ll only see the tags which are present in the currently selected sections (that is, only tags assigned to notes from selected sections will be displayed).