If you work on multiple PCs, e.g. at home and at work, or want to have your notes always at hand on your mobile device, you will probably want your notes to be automatically synchronized. CintaNotes supports two kinds of synchronization: via the Simplenote service and via DropBox.
Simplenote Synchronization
Simplenote is an online service for notes which allows any application to share and synchronize notes over the cloud. It is the preferred way to synchronize, since it makes your notes available in a large variety of Simplenote-enabled note-taking applications on multiple platforms, which include Mac, Linux, Android and iOS.
Here are the steps needed to configure CintaNotes for Simplenote synchronization:
- If you don’t already have a Simplenote account, go to the Simplenote
website and click on “Create an account”. - After you have your Simplenote account ready, run CintaNotes and choose the File / Synchronization command.
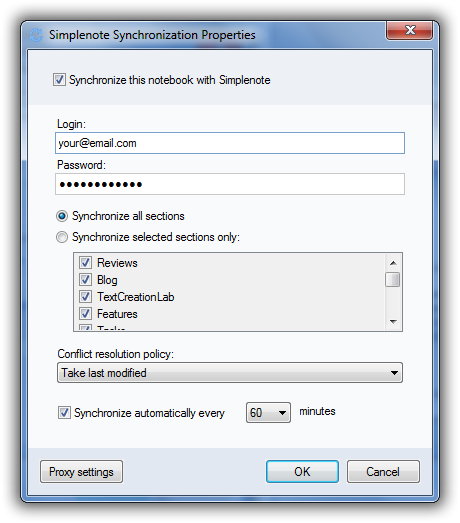
- In the dialog that pops up, check the Synchronize this notebook with Simplenote checkbox.
- Enter your Simplenote login and password into the corresponding fields.
- You can synchronize all sections, or pick which sections should be synchronized. CintaNotes sections are mapped onto Simplenote tags: section “MyNotes” will become a “#section/MyNotes” tag in Simplenote.
- The Conflict Resolution Policy field lets you configure what CintaNotes should do in a situation when a note has been modified both in CintaNotes and in Simplenote. The default behavior is to keep the version which has been modified last.
- If you’d like to have CintaNotes synchronize notes automatically in the background, check the Synchronize automatically every N minutes checkbox and select the convenient synchronization period.
- Click OK.
Now when any of the synchronized sections is displayed, a synchronization bar will be displayed on the bottom of the notes list. This bar will display the synchronization progress, and it also allows starting synchronization manually by clicking on the ‘Refresh’ icon with two curved arrows in the shape of a circle.
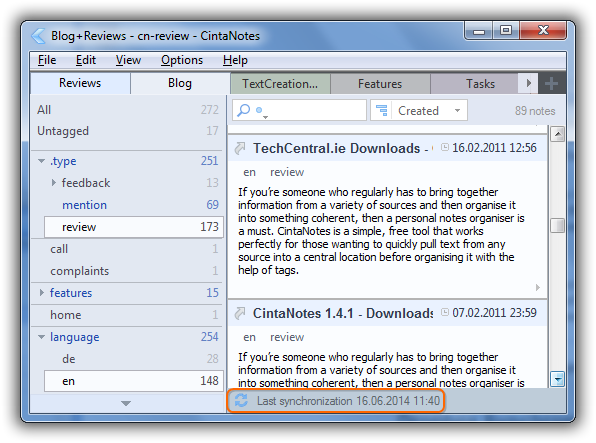
The synchronization can also be started manually at any time via pressing the F12 key.
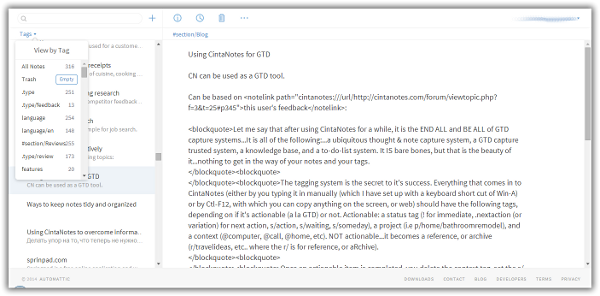
Now you can access and edit your notes online at the Simplenote website:
Synchronize CintaNotes Notebooks with Your Mobile Devices
If you want to access your notes with your mobile devices, follow these steps:
- Start by establishing synchronization between the Simplenote service and CintaNotes on your PC.
- Install your preferred Simplenote supported app from the list and install it on your mobile device.
- Synchronize notes between Simplenote, your PC, and your mobile device.
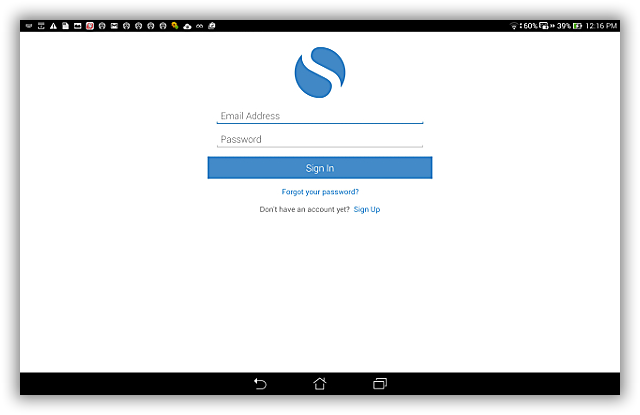
For demonstration purposes we’ll use the official Simplenote app for Android, which you can get on Google Play. After installing, the app starts with the following welcome screen:
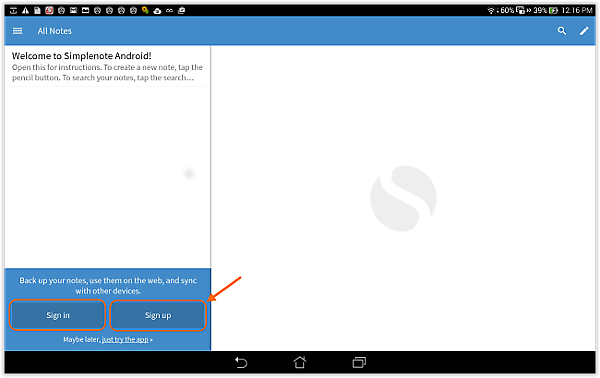
If you’ve already created a Simplenote account and have synchronized your notes from your PC to the Simplenote server, just sign in with your login and password now. If you still don’t have a Simplenote account, you can create one by clicking on the Sign up button on the welcome screen and following the steps as described.
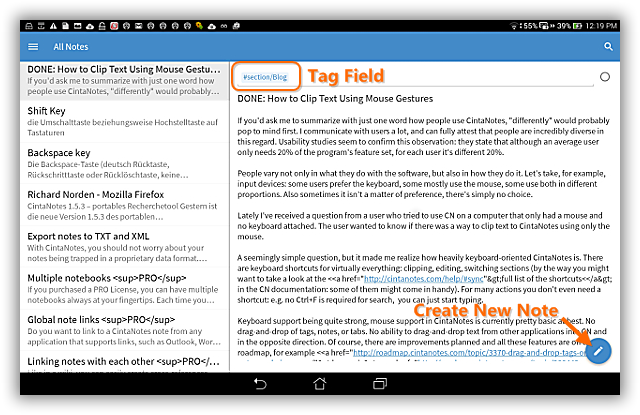
After signing in, Simplenote will immediately start synchronizing the notes on your mobile device with the notes on the Simplenote server. Your tags are visible in the tag field. You can create new notes by pressing the blue icon in the lower left corner:
You can activate the scrollable tag list by tapping on the menu icon on the toolbar:
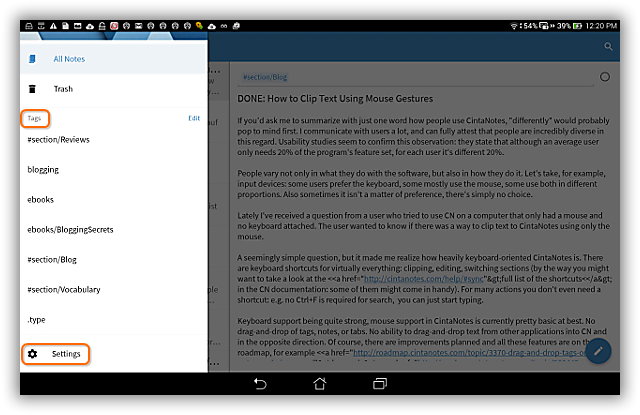
From here you also have access to the app settings.
Working with Several Notebooks on Your Mobile Device
Unfortunately you can synchronize only one CintaNotes notebook per Simplenote account. If you need to synchronize several notebooks, create additional Simplenote accounts with different email addresses on the Simplenote server, synchronize them with your CintaNotes notebooks (one email address per notebook), sign out of your Simplenote account in the app settings on your mobile device, and sign in with the account you want to work with. Your notes will be immediately synchronized.
Dropbox Synchronization
Though Simplenote synchronization is only for PRO users, Dropbox synchronization is available for all users, even in the free version of CintaNotes! Its advantage over Simplenote synchronization is that no data transformations take place, so on all Dropbox-connected instances of your CintaNotes you’ll get exactly the same database. Also, Dropbox allows synchronizing the whole notebook and not just one section of it.
The downside of this kind of synchronization is that as CintaNotes is a Windows-only program, it can sync only to other Windows PCs, and you won’t have access to your notes online or on other platforms.
The recommended way to setup Dropbox synchronization is as follows:
- Go to the Dropbox website and install the Dropbox client. A synchronized
folder called “My Dropbox” will be created. - Make sure that the CintaNotes program and settings files are outside of this Dropbox folder (e.g. in
“C:\CintaNotes”). - Run CintaNotes
- Save a copy of your notebook inside of the “My DropBox” folder using the File / Save As… menu
command.
On any other PC with the Dropbox client installed and connected to your Dropbox account, run CintaNotes and open the synchronized notebook file in its “My Dropbox” folder using the File / Open… command. That’s it! Now your notes will be automatically synchronized. Configuring for other synchronization services like Google Drive, Microsoft OneDrive, or SugarSync is similar.
Moving the CintaNotes program and its settings files into the Dropbox folder is NOT recommended because:
- The backup files will constantly be “conflicted”;
- You won’t be able to have separate settings on different PCs.
You don’t have to close CintaNotes for your notes to be synchronized. After 30 seconds of inactivity, CintaNotes releases the notebook file lock. But please allow some time (usually about 2-10 minutes, depending on your internet connection) for a full synchronization cycle.
Please understand that if you take notes while offline, or shut down the computer right after you’ve created some notes, these last notes may not be synchronized, and if you then take notes on another PC, conflicts might arise. With DropBox, you will notice them with the appearance of the “conflicted copy” notebook files alongside your notebook file. If you see these files, you will need to merge them back into your main notebook file.
To do that use the File / Import… command on this conflicted file. The import command filters out duplicate notes automatically, so that you will only get the notes that you don’t have. This handles the most frequent case of added notes, but in case of modified or deleted notes you may still have to delete unnecessary notes by hand.